Objective: To go through the steps to “normally” install TheWord in a typical Windows PC.
Introduction
For those who are familiar with installing new programs into their Windows computer, this post will probably be very boring for you, so please jump to the bottom about “Making the decision of what kind of install you want.” I am going through each step of finding, downloading, and installing the program for those newbies to computers here. People have asked me to please be explicit, and don’t assume they know much of anything about computers or Windows.
TheWord is a PC-Windows program, and, in general, it is to be used in a Window PC like any other Windows program. Personally, I have run it on a Toshiba 286 with 6MB of RAM using the USB installation on a USB stick, and it ran quite well. I had about 300-400 modules on the USB stick, with a dongle converting a port on the to a USB drive entrance, and I was surprised how well it did work. The program is robust but very clean, so it will work on low hardware machines, with old operating systems uses with just the “penalty” of running slower, which for people using those kinds of machines, is usually acceptable.
I will mention here, and try to make a post later, that theWord has been successfully installed on Linux, and Mac machines using WINE. For those with those kinds of machines, they will probably be familiar with WINE, which is a WIndows emulation program which allows those operating systems to use Windows programs even though they were not written for Linux or Mac.

Brown The Devil's Mission of Amusement 7 page article from 1889. Hollywood in the church and her ministries. Brown was a student of C.H Spurgeon.
Excerpts:
Different days demand their own special testimony. The watchman who would be faithful to his Lord and to the city of his God needs to carefully note the signs of the times and to emphasize his witness accordingly. Concerning the testimony needed now, there can be little if any doubt. An evil is in the professed camp of the Lord, that is so gross, so brazen in its impudence, that the most shortsighted of spiritual men can hardly fail to notice it.... Amusement for the people is the leading article advertised by each... until the hideous fact has been proved up to the hilt, that "amusement" is ousting "the preaching of the Gospel" as the great attraction... The Concert is fast becoming as much a recognized part of church life as the Prayer Meeting; and it is already, in most places, far better attended.
"Providing recreation for the people" will soon be looked upon as a necessary part of Christian work, and as binding upon the Church of God, as though it were a Divine command, unless some strong voices are raised which will make themselves heard.
Read the 7-page article: Brown, The Devil's Mission of Amusement.
Ways to Install theWord
There are two basic ways to install the main theWord program, the “normal” install procedure, and a USB installation way. In this present post, we will discuss how to install theWord in the normal way.
See
What hardware is required for TheWord to run?
Download the Program
You must always download the program from the official website, and nowhere else. Costas is constantly updating the program, and any other place where you download the program from, you risk getting an older version of the program, if not something worse like a virus or a trojan program to infect your machine. So only download from www.theword.net to be sure to get a clean, uninfected, most recent version of the program.
Download from: www.theword.net
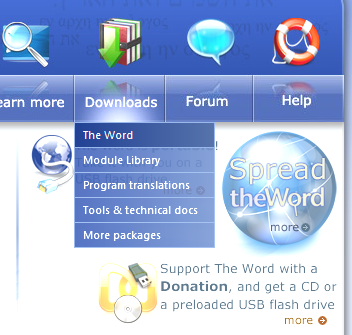
Click on “Downloads” and then on the drop-down box, the bar, “The Word”.
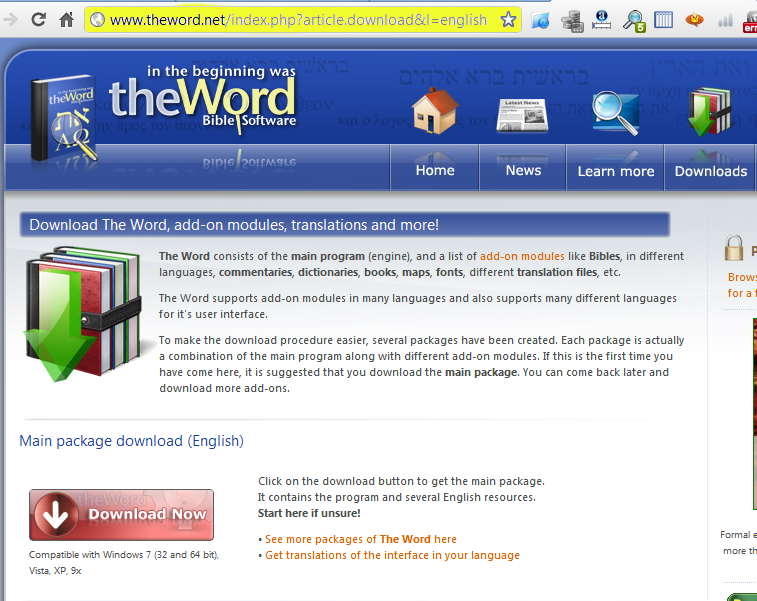
You should be presented with this page.
At this point, you would click on the red “Download” square box button. Your download of the program should begin. If your Windows program is a more recent Windows program, i.e. something like Vista, Windows 7, etc. then Windows will download the program (an exe file) to your Windows download folder, otherwise older versions of windows might prompt you where to download the file, and it doesn’t really matter, as long as you know where it is once the download is over.
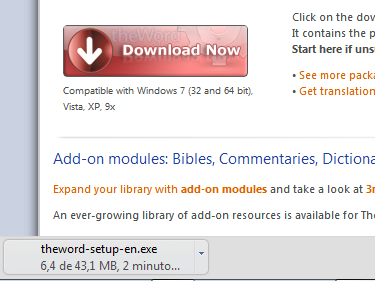
After you have downloaded the file, and it has finished downloading, you need to run the file. In my Chrome browser that I use on my Windows / operating system, after I download the program, there is a bar at the bottom with the name of the download file.
An option to “run” the file or open the directory where the file is. (For those newbies to Windows, click in the Start box on Windows in the lower left-hand corner, and open the Windows Explorer program, and once open, navigate to where you saved the downloaded file.
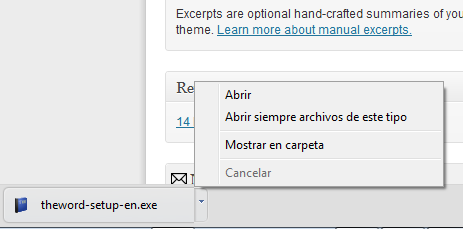
If you are using Windows 7, you can click on the right triangle to open a dialog box and “Open” the file, which will “run it”. Note in the image below, my system is in Spanish, so the options are in Spanish, but in English, the options should be “Open” “Always open this type of file”, “Open destination folder”, “Cancel” or something similar to these options. Choose Open.
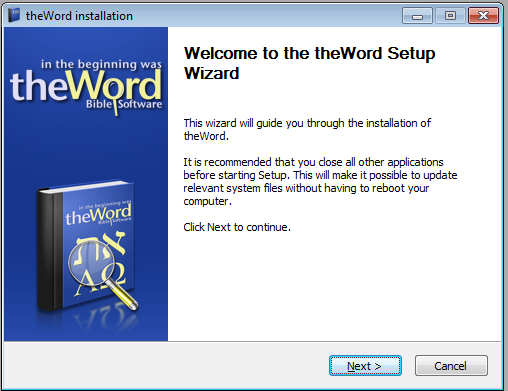
Once you “run” or “open” the exe file, you should start seeing dialog boxes for the theWord installer program. With modern Windows programs, you will probably be presented with a permissions dialog box from Windows asking you if it is okay for it to run this file. Click Accept or Okay and proceed. At this point, you will see the following…
Click on Next to continue.
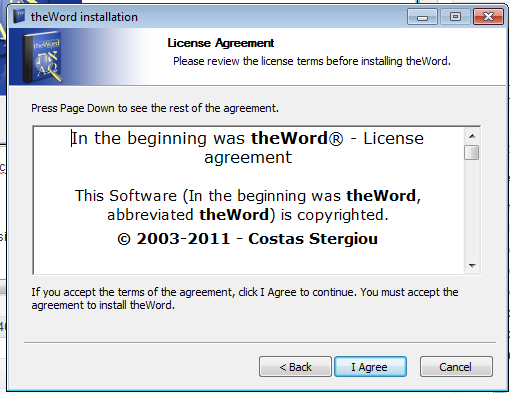
Read the license agreement, and click “I Agree” to continue.
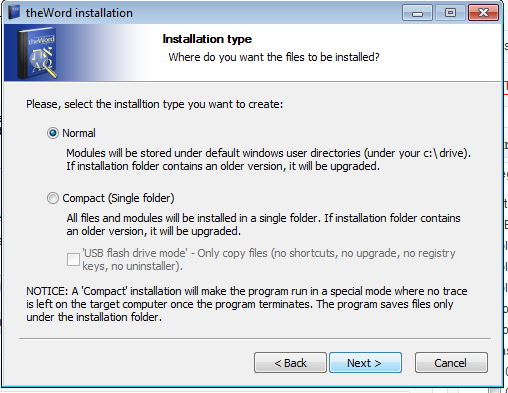
At this point, the installer program will present you with the next dialog box where you must decide which type of installation you want.
Making the decision of what kind of install you want
What are the differences in these two types of installations?
Normal Mode Installation
A normal mode installation will install theWord intoyouru computer and operating system as a “normal” Windows program. Note that this means that it will be copied to the standard Windows program directory, which on my Windows 7 Starter, is “C:/Program Files/The Word” and it will set up the Windows Registry with the correct information, and in the Windows Directory, it will point to its’ user data directory to “C:/Program Data/The Word”. All of this is done “normally” or “typically” (behind the scenes) without you having to do anything (just like any Windows program you happen to install). If you click this option, this will install the program “normally” into your computer.
For the majority of the people, this is the way you will want to use theWord. Read on, and if you want to use a USB installation, you can always come back to the theWord exe file you downloaded, and re-run it, and install a USB installation without problems,
Compact (single folder) Installation
At times, you may want to have a second installation of the program installed on your computer. For example, I am a missionary, and I teach and preach in Spanish. So I find literally thousands of theWord modules in English, and only a few hundred in Spanish, and if I had them all mixed together, I would have a hard time finding the Spanish modules. (Note: A “module” is a file you make or download from the Internet which is essentially “a book” which you use with theWord program, and for example, it can be the KJV Bible module which is automatically included in the program, a commentary like Barnes Commentary, a dictionary like ISBE, International Standard Bible Encyclopedia, or just a religious reference book, like one of Edersheims works, like “The Life and Times of Jesus the Messiah”. All of these are modules, which are separate from the program, and you download these modules and install them into the theWord program so that you can see them and search on them from within TheWord.)
The main difference between a Compact mode installation, and a “Normal” installation is that in the Compact mode install, theWord doesn’t install anything “important” into Windows. (By important, theWord may create or use some files in temporary folders like indexing files, but these are not essential to running the program, and if they are lost, the program will just create them anew on the fly as it needs to.) A normal program is going to be installed into the normal Windows program folders (mentioned above), and it will have registries in the Windows Registry to “find the program” and make a standard Windows shortcut on your desktop. In the Start button listing of programs, it will appear. None of this will be done in a compact mode installation.
Why would this be a benefit?
Simply put, a compact mode installation is a little more work. But the benefit is much greater. When you have a typical Windows installation, and you do a backup, you must search all over for your programs, and only cross your fingers and hope that you got everything and reinstalling the program will restore things to “the way they were.” If this is your fear, do a Compact installation, and burn a backup CD with just the Compact mode folder, and you will have everything exactly the way it was when you did the copy-burn of a backup. (Also you can just copy the entire folder over to a USB Flash memory drive, or external harddisk and it works the same way.)
When you run theWord from a Compact Mode folder, everything that Windows needs for the program to run is directly in that folder, and not spread out all over your hard disk in a dozen folders.
There are two benefits here: 1) If you want a second or more instance of the program for other purposes on your hard disk, this is the way to do it, or 2) if you want to install the program onto a USB flash memory drive, and carry the program around with you, this is also the way to do this.
Note: In the dialog box above, you will see an addition checkbox (USB flash drive mode) which will be a completely “clean” installation without any references elsewhere on your computer to the program.
If this mode is what you want, please see my post on this installation mode.
Finishing up the Installation
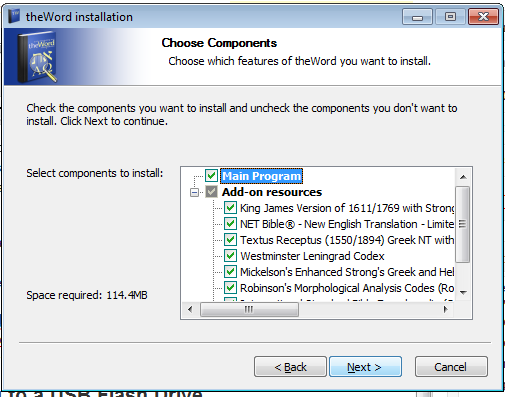
Once you select the type of installation you want, proceed (click “Next”). TheWord installer program comes with a number of free modules for you to install if you so desire. The installer program will present you with this dialog box for you to choose which modules you want to include.
What this dialog box does is simply present the modules that are included in the installation exe, and you can check the ones you want or unclick the ones you don’t want. Other than occupying space on your hard disk, there is no harm done by installing everything, even if you don’t know what a particular module is about. (Note: Of these resources, you ABSOLUTELY MUST HAVE A BIBLE INSTALLED OR THE PROGRAM WILL NOT RUN!. If you don’t want the KJV, install it anyway, and later remove it. The program is a Bible program, and it is not designed to run without a Bible. In fact, if you don’t have any Bible installed, it will bring out of its archives a copy of the KJV so that it can run.)
Of these included modules, the absolute keepers are Mickelson’s enhanced Strongs, ISBE, and TSK (Treasury of Scripture Knowledge). Don’t uncheck these, because they are extremely useful.
What if you don’t install one of these files, and want them later
The only way I know of to get them is to install theWord again in a compact mode installation, and copy the modules from there into you regular theWord folders, then delete the compact installation. A lot of work when just installing them from the begininning is much easier.
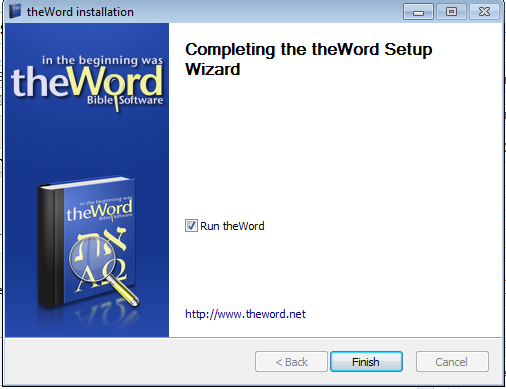
The next and final dialog box is an optional “Run theWord (now).”
Note that you will get a few modules automatically in the installer program, but there are a tremendous amount of free modules out there to download and install.
Please visit my theWord module library with thousands of free modules at
At this point, you will also need to study various other posts on this website.
This video is just a normal run through of installing theWord.
More Articles from this Category
- Where does TW keep its files?
- What Operating System does TheWord require?
- Tips and Tricks
- theWord required hardware
- theWord Bible Software (1 of 4): Downloading and Installing
- Specialized theWord Study Area

